
Inherit the contents of past lesson sites
- "STEP 1 Import data from the previous lesson site to the new lesson site"
- "STEP 2. Reset the publication date and time"
*You can import data not only between past lesson sites, but also between lesson sites where you have instructor privileges.
STEP 1 Import data from the previous lesson site to the new lesson site
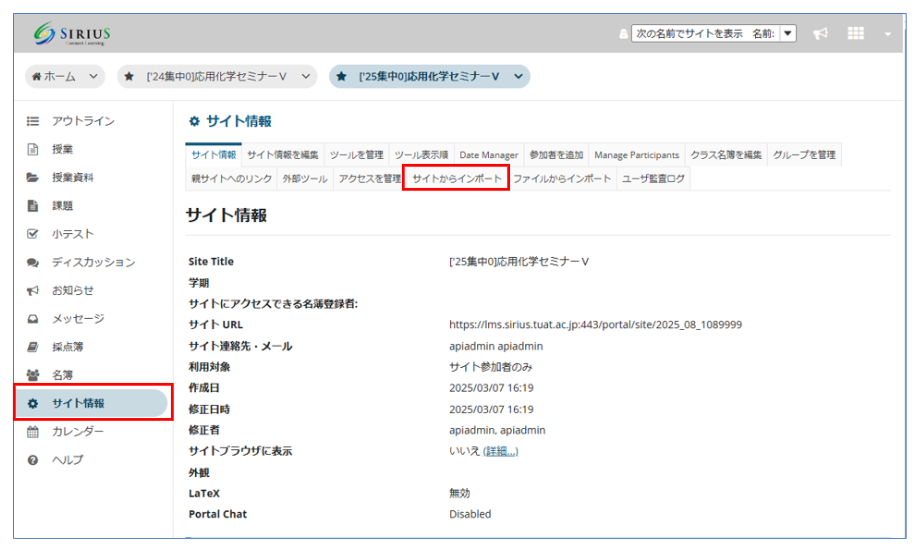
Click on
the "New Class Site"
to which you will be redirected and then click on
"Site Information"
on
the "Outline Screen"
.
Select the
"Import from Site"
tab.
There are two ways to migrate data:
"replace"
and
"merge"
.
"Replace"
will erase all existing data and leave only the newly migrated data in its place.
When you
"merge,"
the existing data will remain and the newly migrated data will be added.
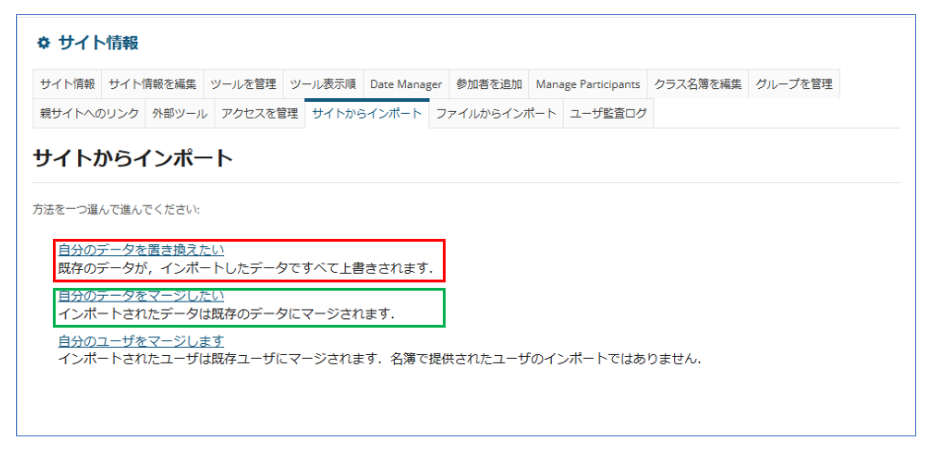
Click "I want to replace my data" or "I want to merge my data" .
【Note】
If the original course has a syllabus that can be linked, then the syllabus can also be linked for the replaced course.
If the course being replaced was deleted and recreated, or if it was newly created through a merge operation, it is not a course that can be linked via syllabus. Therefore, if you need to update the syllabus in the LMS after the replacement, please do so from the LMS.
【Note】
You cannot merge (combine) "classes". If you check "classes" and perform a merge (combine) operation, a new "class" will be created, resulting in two "classes".
Please do not delete the [Courses] that were provided from the time the site was created, as they are used for syllabus integration. If new [Courses] are created after merging, please check their contents and manually transfer only the necessary information to the [Courses] that were provided from the time the site was created. Please note that [Courses] newly created through merging cannot be used for syllabus integration.
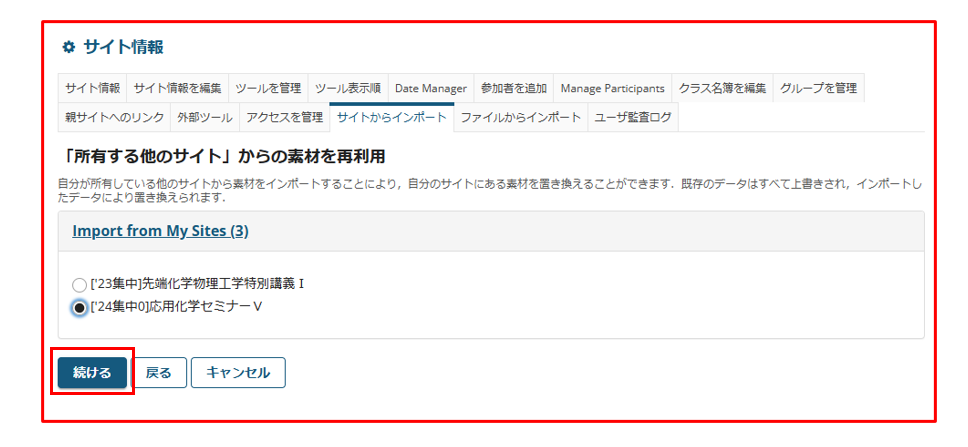
I want to replace my data
Check the class site you want to transfer to and click "Continue."
Check the items you want to transfer and click "Finish."
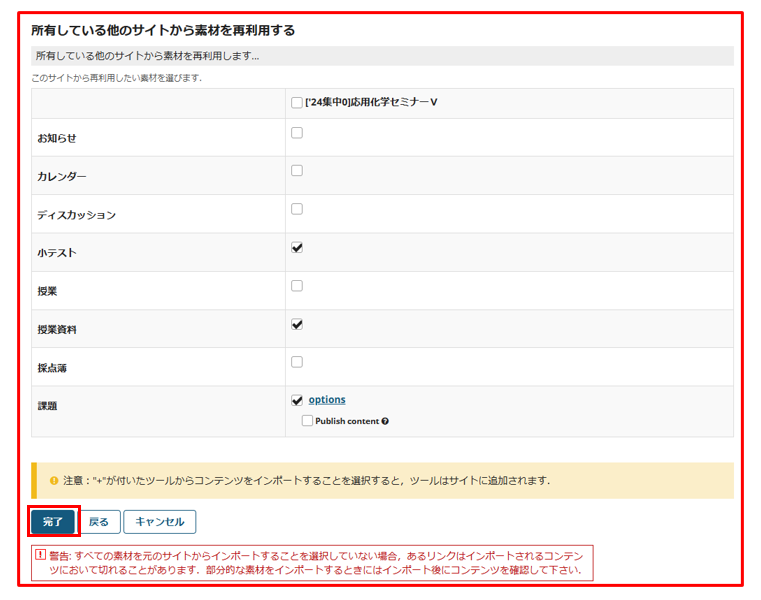
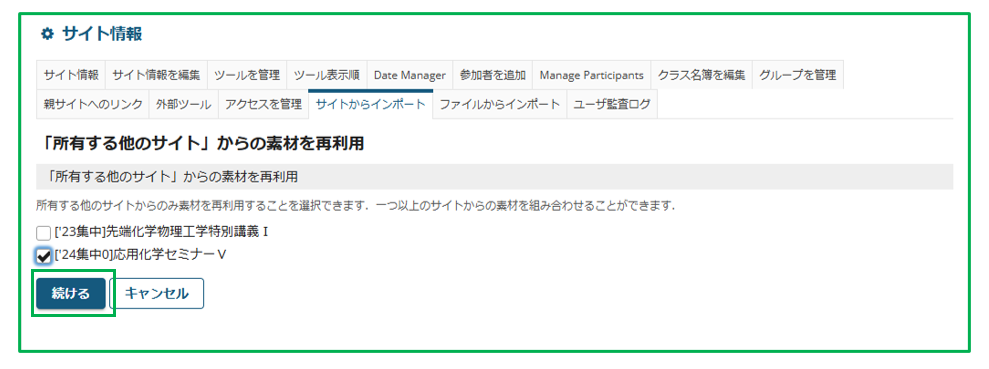
I want to merge my data
Check the class site you want to transfer to and click "Continue."
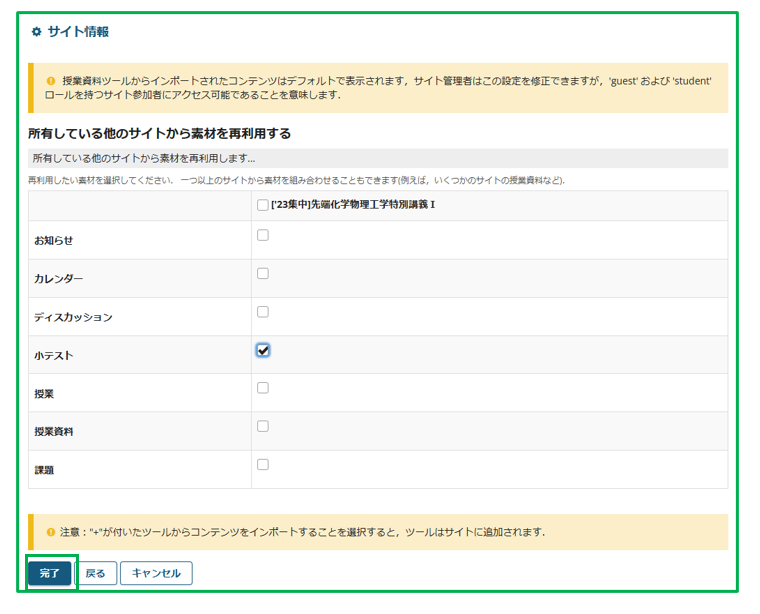
Check the items you want to transfer and click "Finish."
STEP 2. Reset the publication date and time
"Announcements," "Quizzes," and "Assignments" will be migrated in a private (draft) state, so you will need to set the publication date and time on the new course site. Also, if the publication date and time for "Class Materials" has not been set before the migration, it will be made public the moment it is migrated. If you need to set the publication date and time, don't forget to do so.
- "How to set the publication deadline for announcements"
- "Steps to set the quiz release deadline"
- "How to set a deadline for publishing an assignment"
- "Procedure for setting the deadline for publishing class materials"
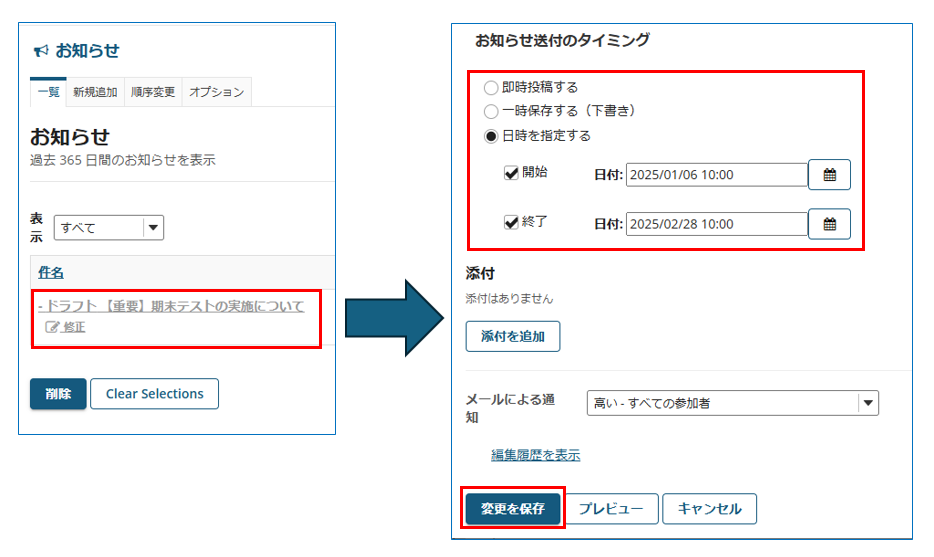
To set a publication deadline for an announcement:
The migrated data is in a draft state .
Set the publication date and time, and click "Save Changes" at the bottom to publish.
Steps to set the quiz release deadline
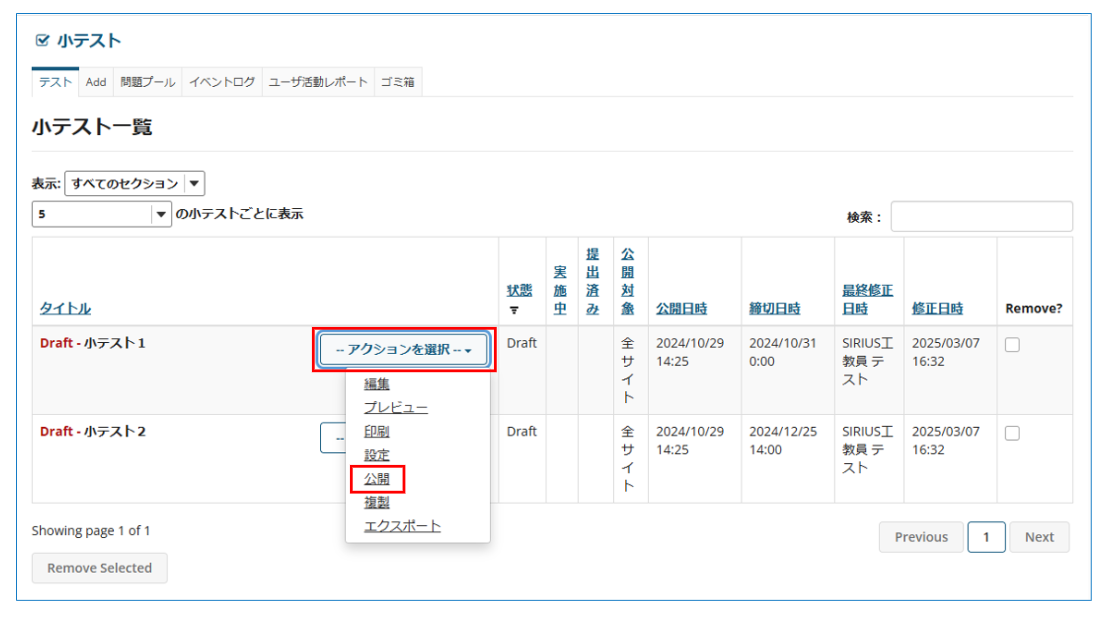
The migrated data is in
a draft state
.
Under
"--Choose an action--",
click
"Publish"
.
The next screen will show you the current settings for your quiz. If you are happy with these settings, click "Publish" to publish it. If you want to change the settings, click "Edit Settings" .
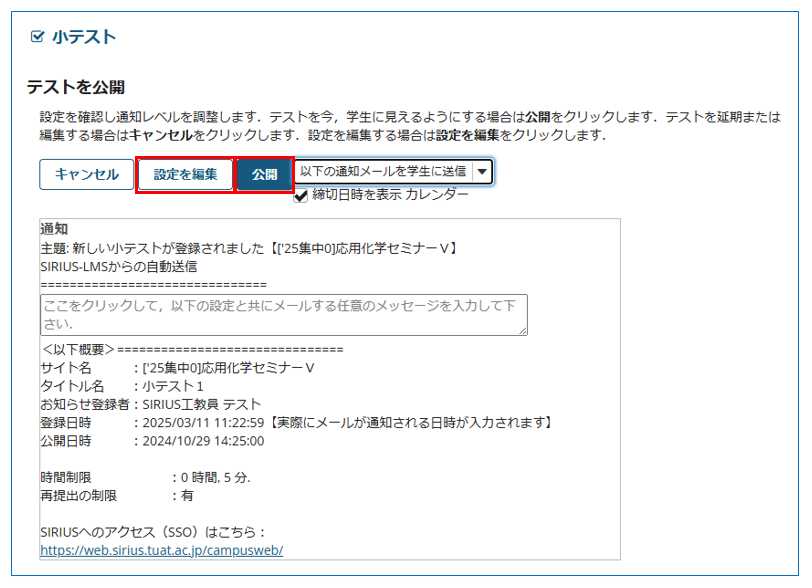
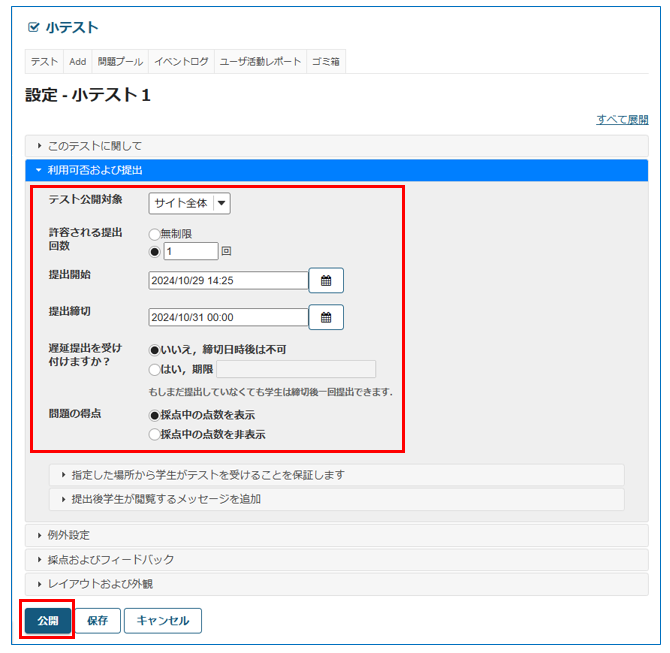
If you click "Edit Settings" , you can edit the publication date and time etc. on the next screen, then click "Publish" to publish.
*If you want to copy quizzes individually, please use the export/import function within the quiz on the source/destination site.
To set a deadline for publishing an assignment:
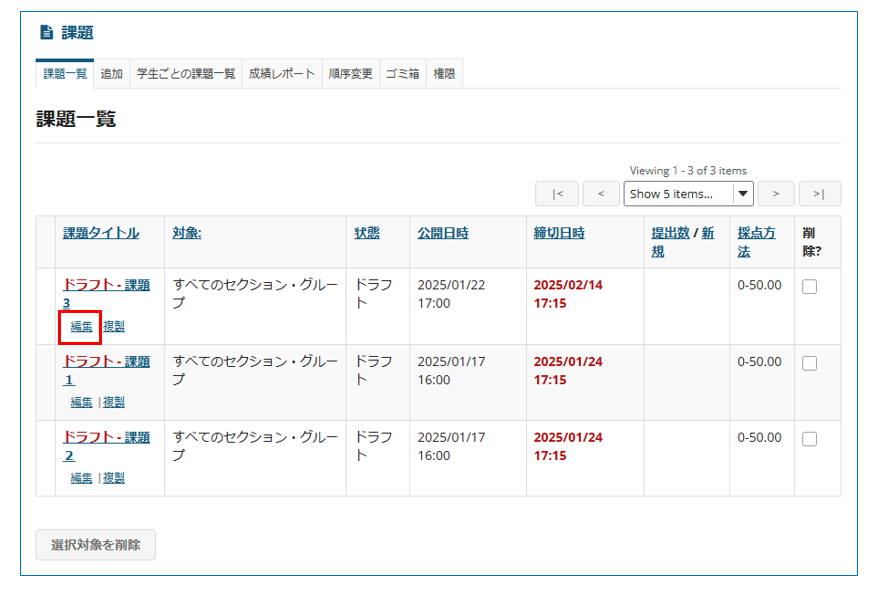
The transferred data will be in draft state . Click "Edit" under each assignment name.
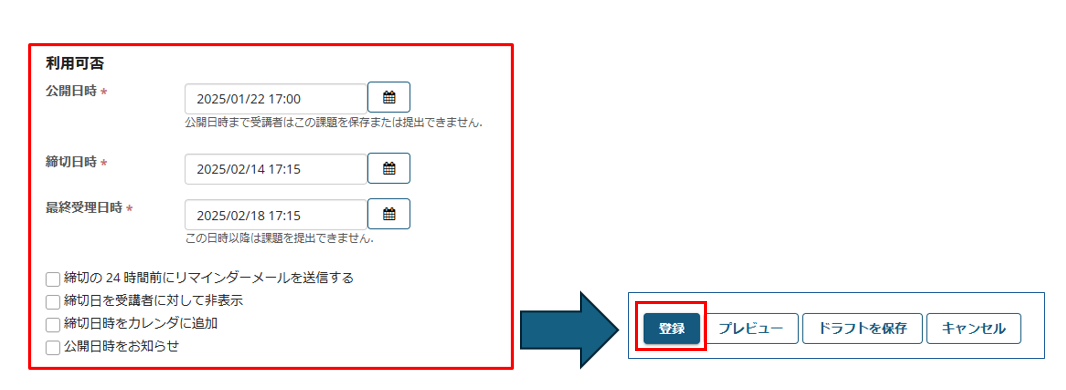
On the next screen, set the publication date and time of the assignment, and click "Register" at the bottom. It will be published at the specified date and time.
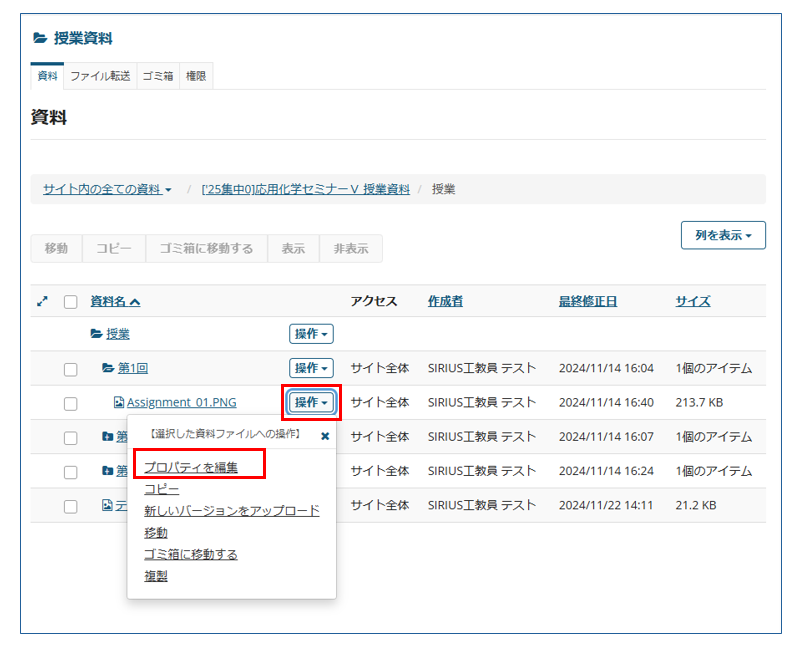
How to set the deadline for course materials
The migrated data will remain publicly available on the previous site.
Under
Actions,
click
Edit Properties
.
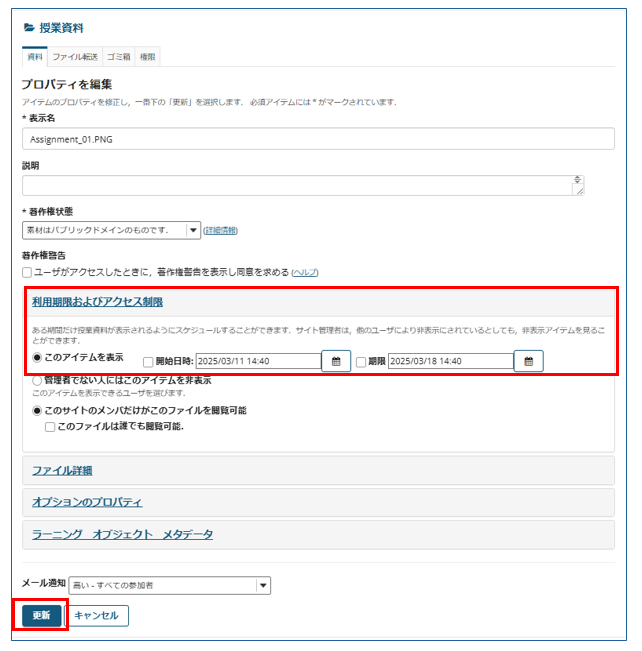
On the next screen, under "Expiration and access restrictions," set the date and time under "Show this item ," then click "Update" at the bottom to set the date and time.
*If you want to copy class materials individually, please use the "Copy content from other sites" option at the bottom of the class materials screen on the destination site.